LogMAR charts have many advantages over Snellen charts. However, scoring a LogMAR chart can be confusing to begin with. A utility to help with scoring can be displayed on the Floating Control window by selecting Tools... LogMAR Scorer form the menu at the top of the screen.
The LogMAr scorer is shown on the left of the screen while the thumbnail is resized and positioned on the right of the screen as shown.
The logMAR scorer shows the the Current Set of letters Optotypes as defined.
A different Optotype Set may be selected by clicking on Set 1 - Set 5 at the top of the panel or randomised by selecting Rand.
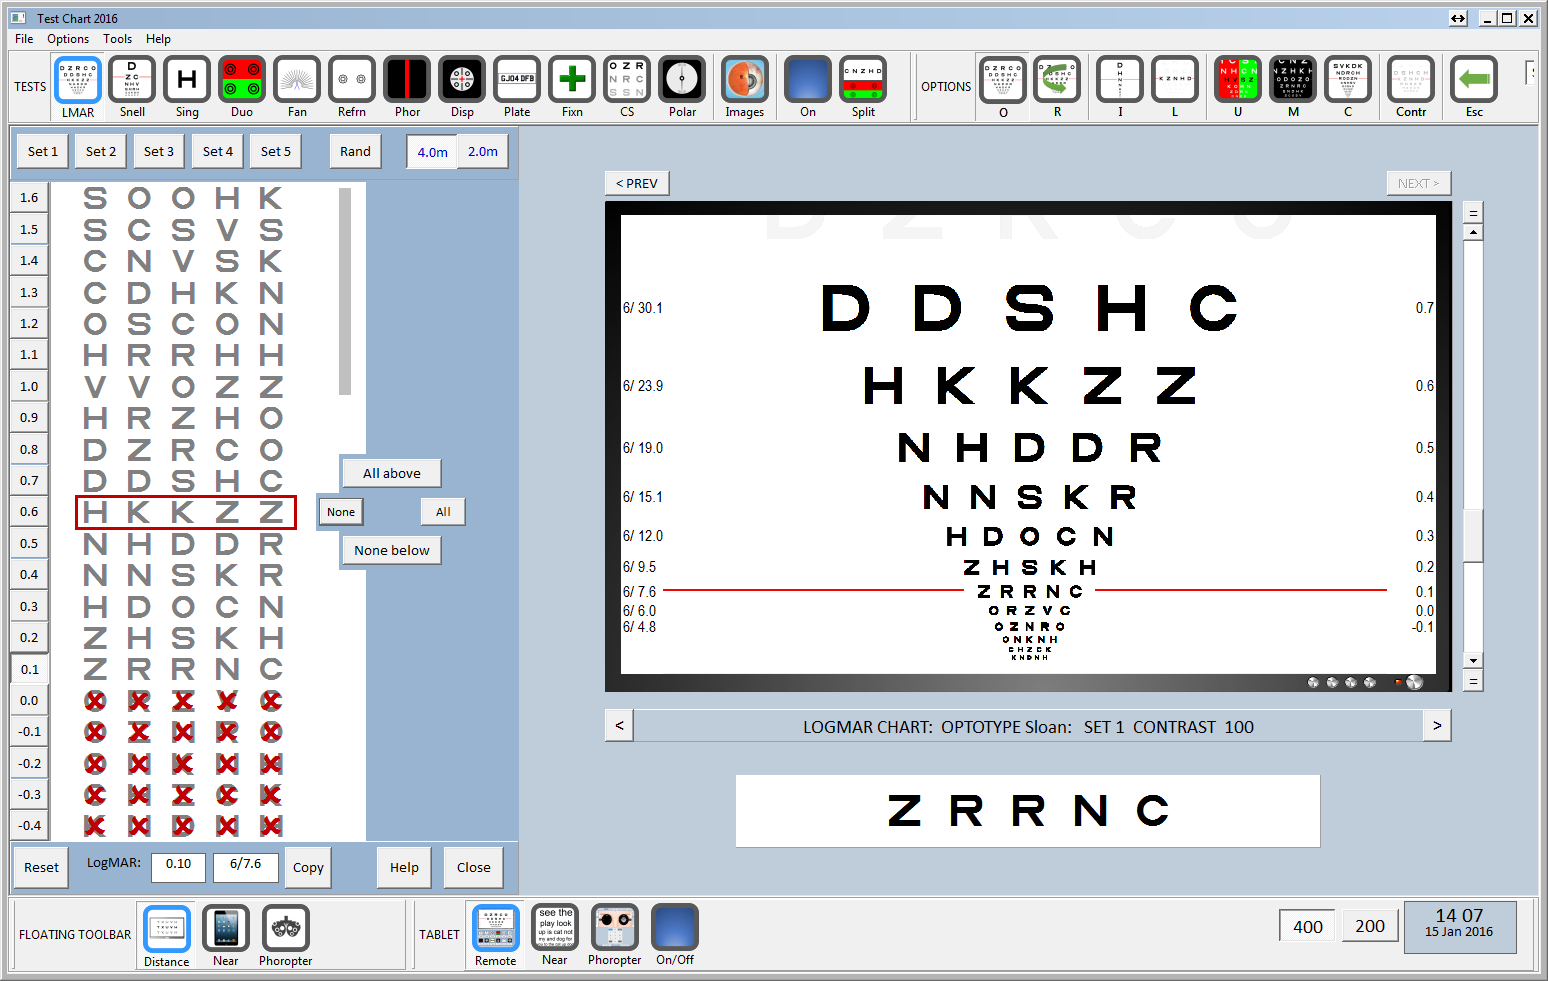
A starting LogMAR size is selected by right-clicking directly on the letters in the scoring panel or by selecting the required LogMAR button on the left of the panel. The Current Row will be outlined in red and the Test Chart will automatically scroll to the current LogMAR. The patient should then be asked to name the letters on the current row. The examiner clicks on any letters on this row in the LogMAR scoring panel that the patient cannot read. A red cross will be shown in front of the letter to show that it was not read as shown below:
If None of the letters on this row are read, this can be recorded by simply clicking on None, All the letters on the row will be marked with a red cross. To remove all the red crosses on a row select All. An individual red cross can be removed by clicking on it.
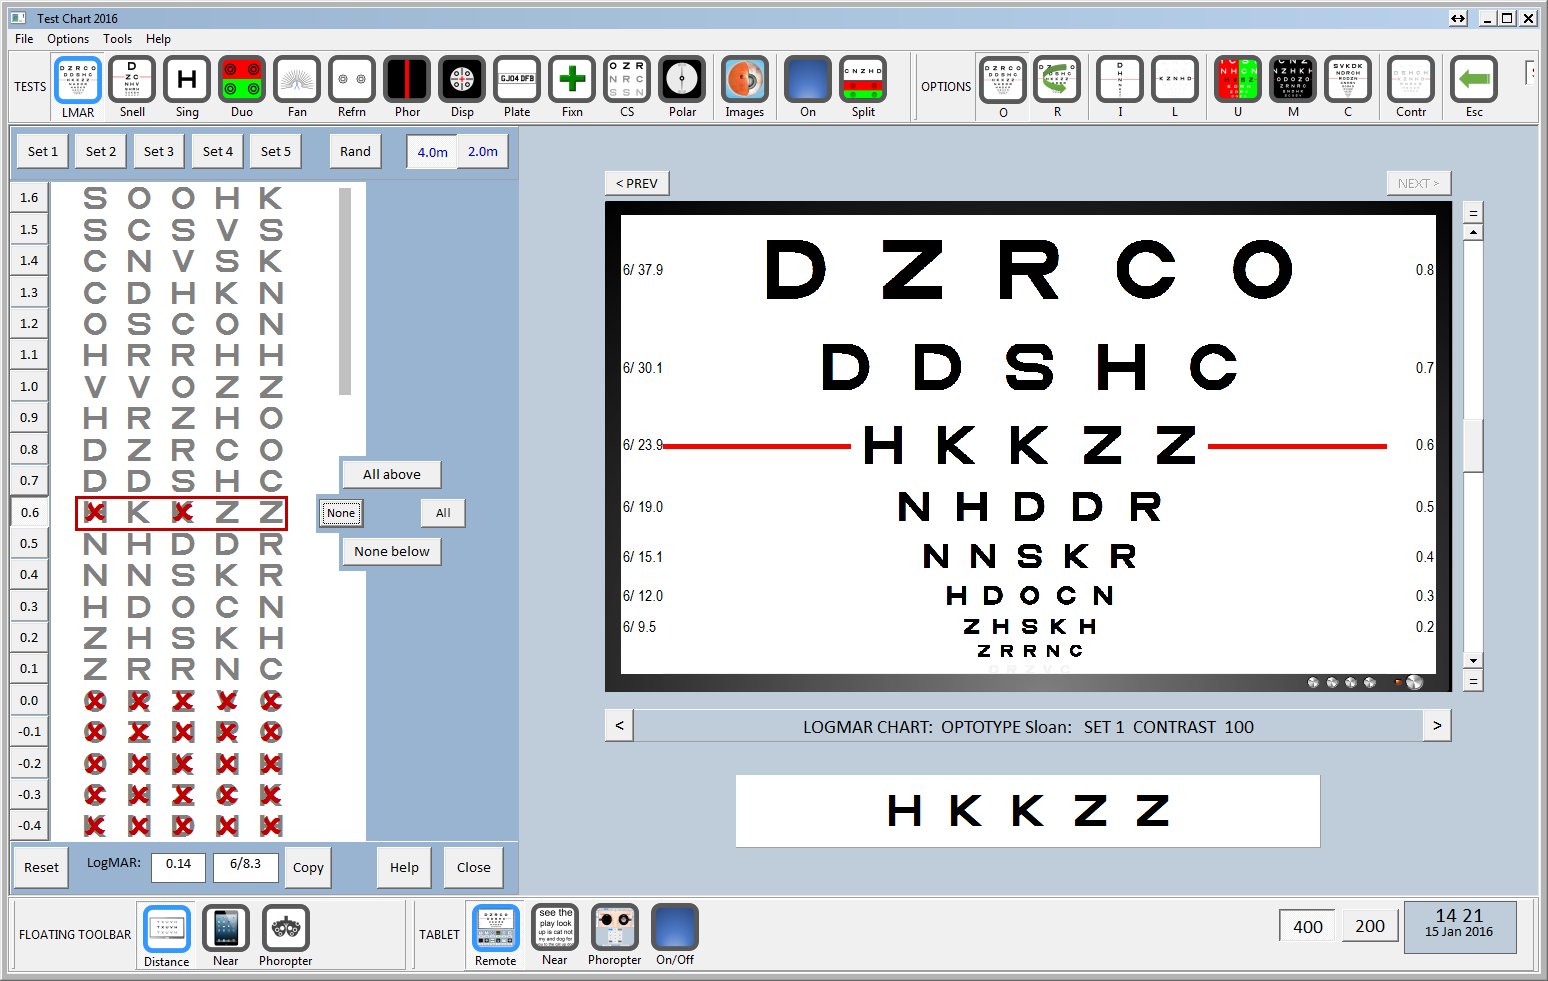
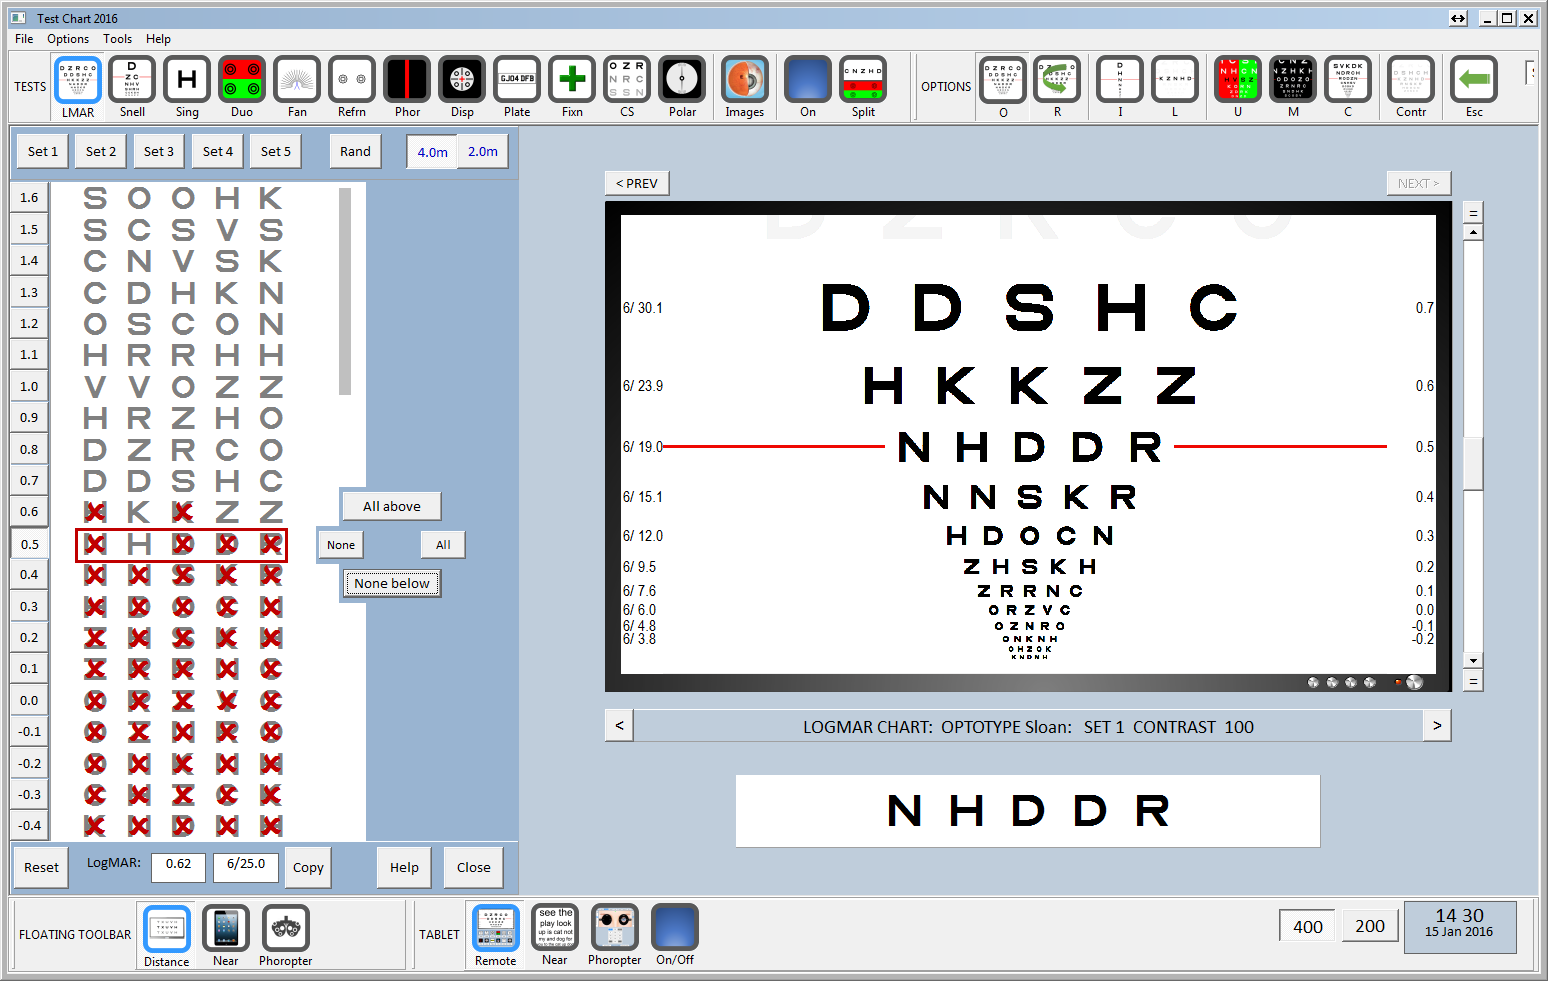
In general, if a patient manages to read any of the letters on a row, they should be asked to attempt the next row down. This process is repeated until the patient cannot identify any letters on a row. It follows that if they cannot read any letters on a given row, they will be unable to read any of the letters on any of the rows below. This can be recorded by clicking on None below. This will automatically add crosses to all the letters below the current row. Conversely, clicking on All above clears the crosses from all the rows above. A typical endpoint might look like that shown below.
Partial rows
For patients with poor vision, it may not be possible to display all five letters on the screen. In this case, Test Chart 2016 will automatically show the maximum number of letters that will fit. The range of LogMAR sizes where less than five letters will be displayed are shown by the grey bar to the right of the letters on the LogMAR scoring panel.
For these sizes, the practitioner may simply present less than five letters and show the row in two or more presentations. To select partial rows, simply right-click on individual letters in the row. A partial row will be displayed as shown below:
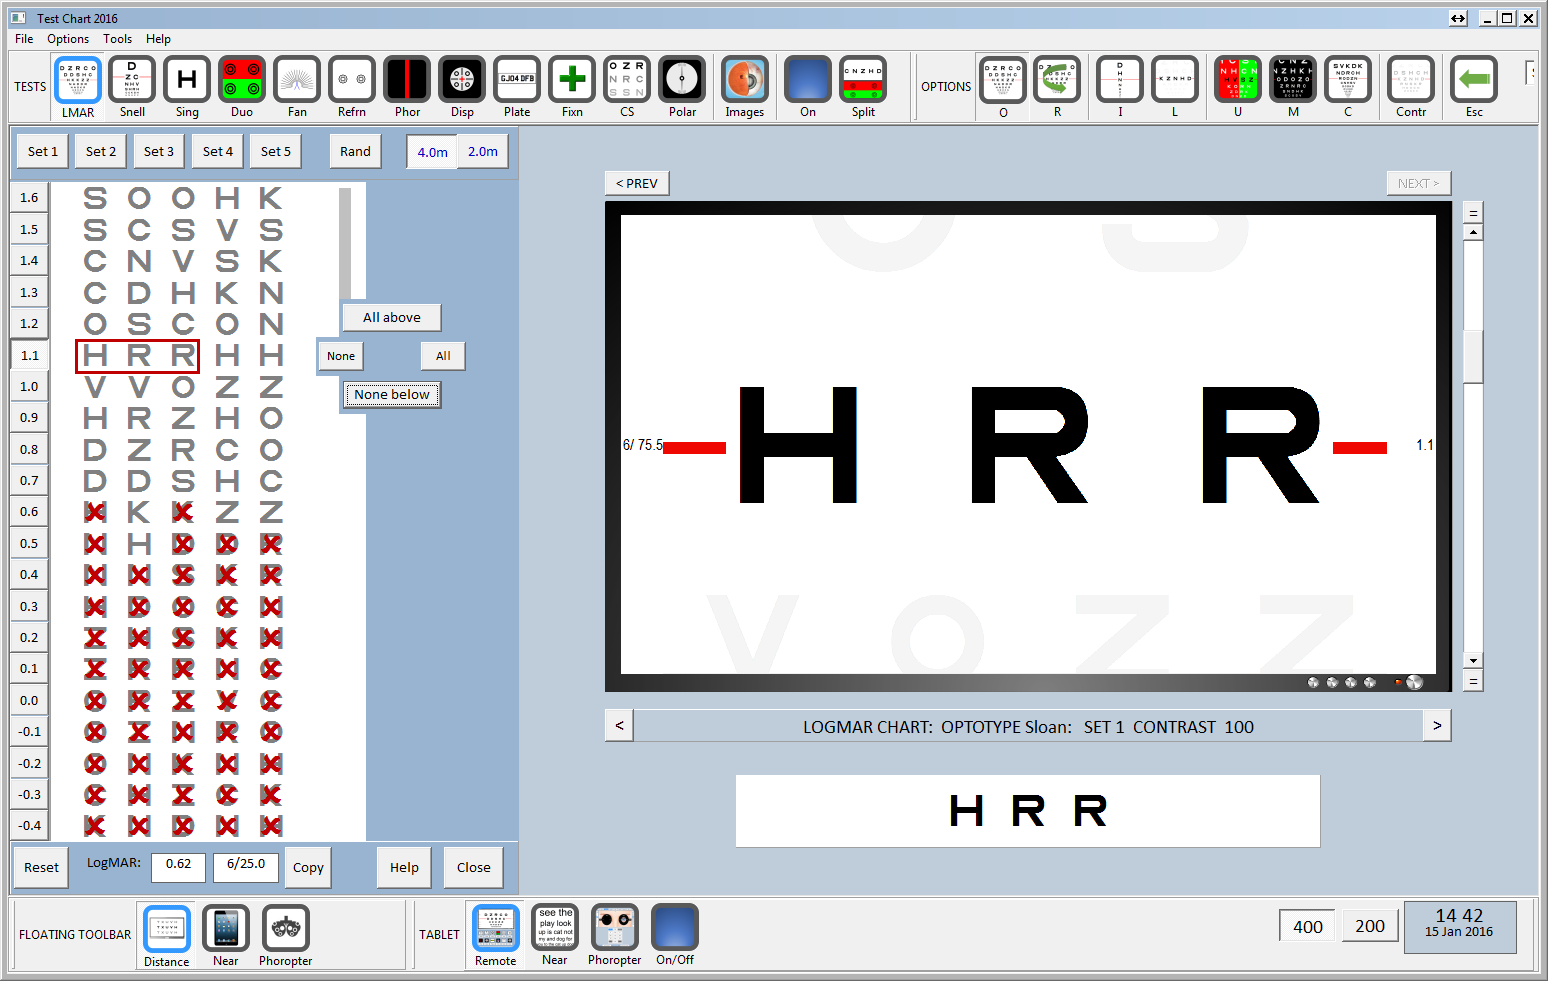
The partial rows are scored in exactly the same way.
NOTE: Theoretically, showing less than five letters on a row could change the overall crowding / contour interaction and thus influence the LogMAR score. In practice, the effect is minimal and much smaller than the test/ retest repeatability of the LogMAR test, particularly for patients with poor visual acuity.
Changing the viewing distance
An alternative approach for patients with poor visual acuity is to move them closer to the chart. Test Chart 2016 allows two viewing distances to be specified. The two available viewing distance are shown at the top of the LogMAR scoring panel.
Clicking on the closer viewing distance (and moving the patient to the closer viewing distance) will reduce the size of the letters for a given LogMAR size and therefore move the ceiling for displaying five letters per row. The grey bar to the right of the letters will be shifted upwards to show the extended range of five letter rows. The new range may allow five letters to be displayed for the patient's visual acuity.
Calculating the LogMAR score
The module automatically calculates the LogMAR score and the equivalent Snellen score and displays these at the bottom of the panel. These values can be copied to the clipboard and pasted into a Patient Management System.
Resetting
The LogMAR scoring panel is reset by clicking on the Reset button.